Reference resources:
https://www.webdigi.co.uk/blog/2015/how-to-setup-your-own-private-secure-free-vpn-on-the-amazon-aws-cloud-in-10-minutes/
Creating your Private VPN Server
================================
1. Setup a free Amazon (AWS) cloud account.
Visit http://aws.amazon.com/free/ and complete the signup. If you already have an Amazon AWS account then please login and follow on.
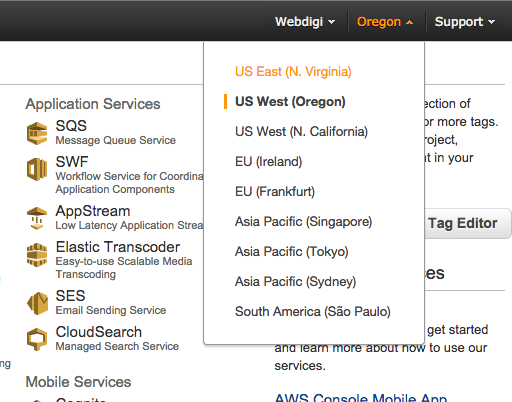
- Select a region for your VPN server.
The VPN server can be in the following locations – North Virginia, Oregon, California, Ireland, Frankfurt, Singapore, Tokyo, Sydney, São Paulo. All your traffic will flow through the region that your VPN server is hosted. The selected region will appear in bold next to your name on the top header bar.
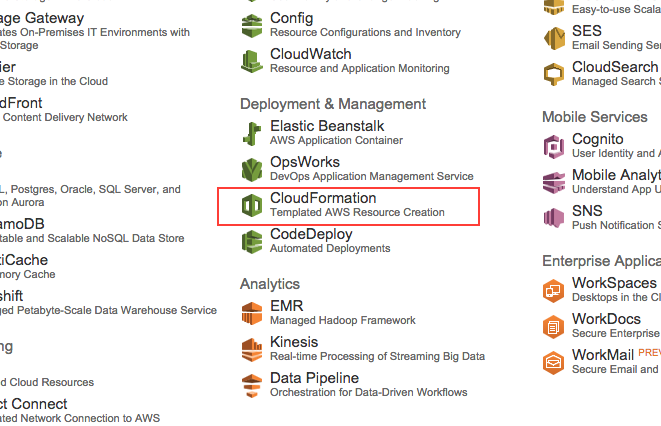
3. Open CloudFormation in the Amazon AWS control panel.
You can follow this link or click on the cloud formation link from the AWS page.
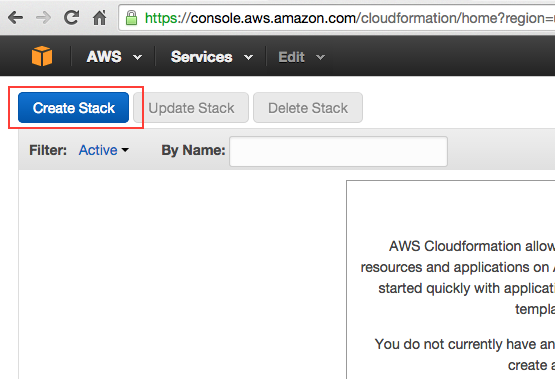
4. Start creating a stack with CloudFormation. Click on “Create Stack” button on top of the page.
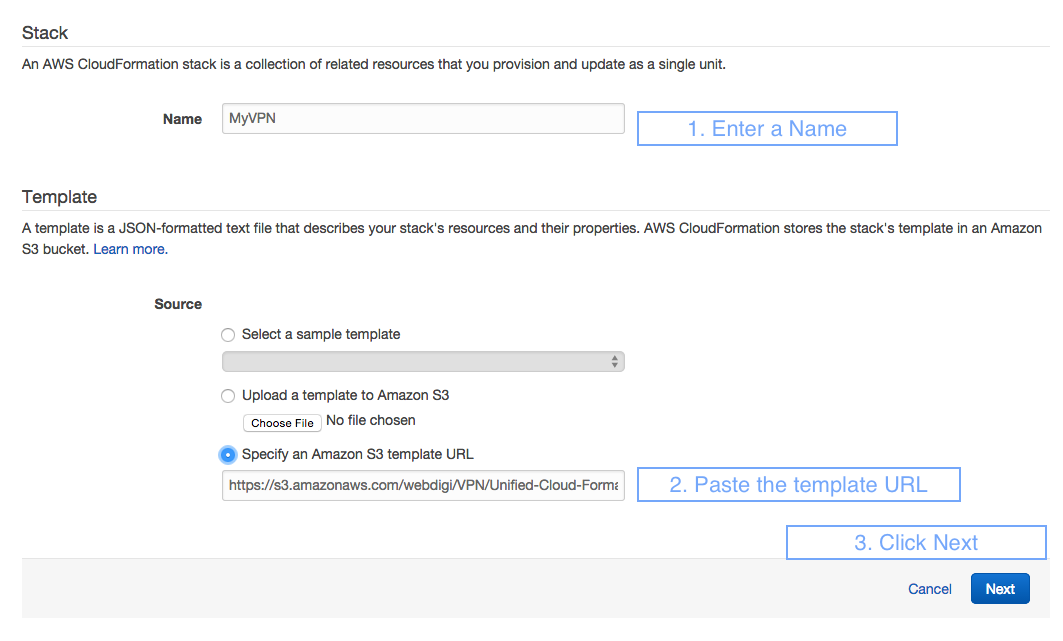
5. Setting up the template for the stack
Enter a stack Name say MyVPN (you use what you like). Then under Template, Source, select “Specify an Amazon S3 template URL” and paste in this URL https://s3.amazonaws.com/webdigi/VPN/Unified-Cloud-Formation.yaml and then click Next.
6. Setup VPN access details in the Specify Parameters page
Speed: Select Standard.VPN-Free and this should do for most use cases. We have also added faster server options if you ever require VPN with multiple simultaneous video streams and so on.
Username: VPN username for your VPN server.
VPNPassword: VPN password for your VPN server.
VPNPhrase: VPN passphrase the L2TP – IPSEC connections on your VPN server.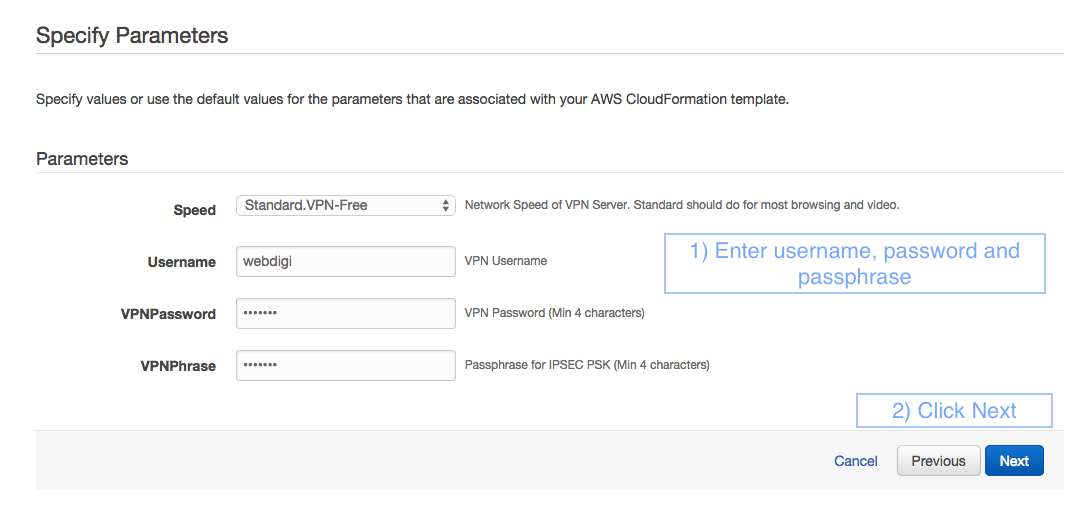
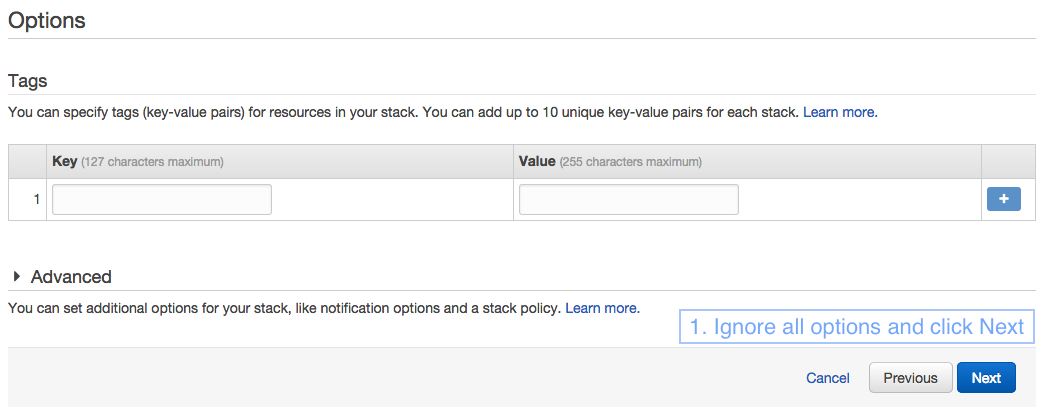
7. You will then be taken to the Options section and you can click Next without having to fill anything on this page.
Finally, you will see a review page as in the screenshot below. Just click on Create and the VPN server will be created in a few minutes.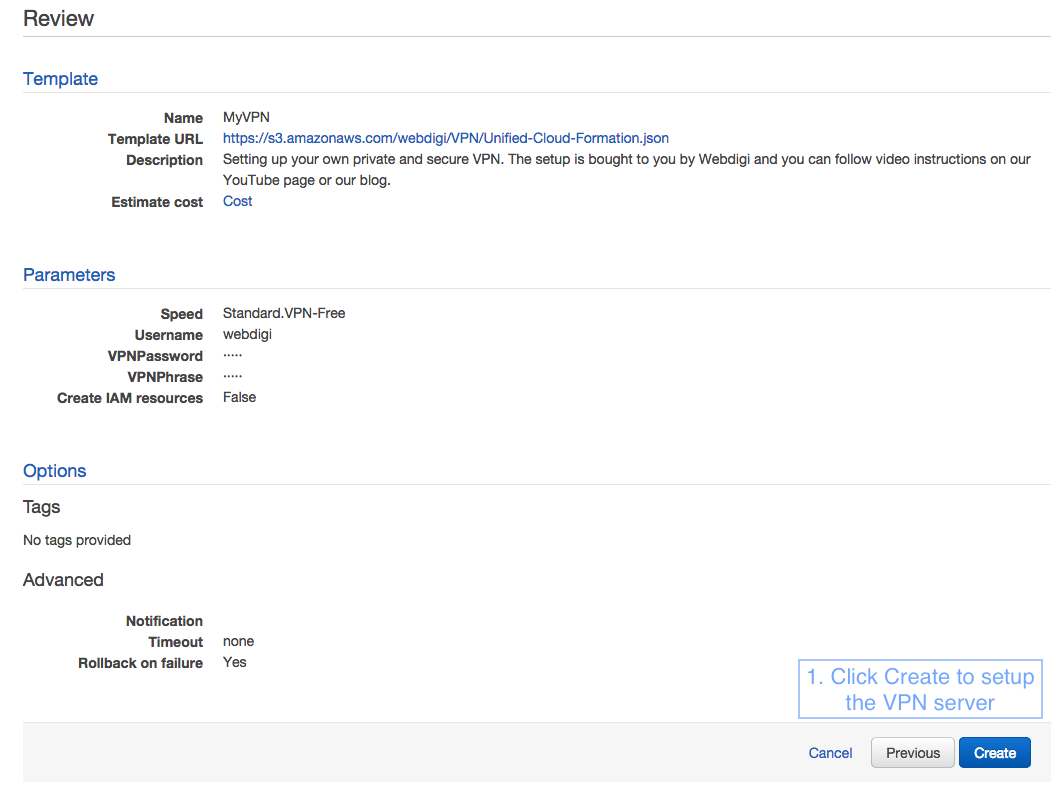
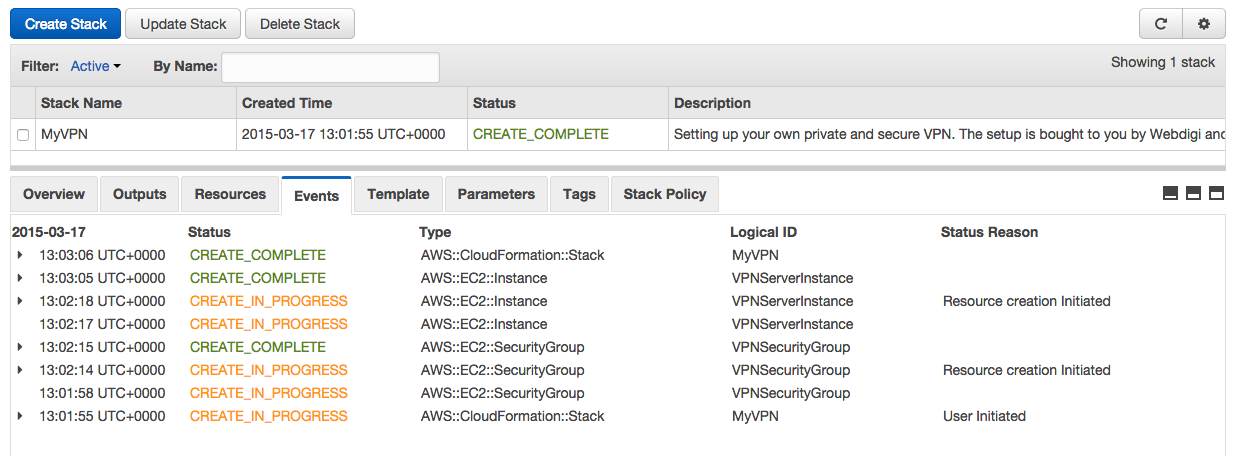
8. Monitoring the VPN server creation
You will see a page which shows that the status is Create in progress as below.

Within about 2 minutes you should see that the stack create in progress is complete as below.
9. Obtain the private VPN server IP address
Once the stack status shows as CREATE_COMPLETE you can then click on the Outputs tab.

Now in the outputs tab you can see the server IP address as highlighted below.

Awesome, you should now have your private VPN server running in the IP address shown in the outputs tab. Please note that the IP address is unique for your server and you need it to connect your devices. Now your VPN server is ready and let us connect to it.
Connecting to your private VPN server
=====================================
Each device has its own configuration to connect to a VPN server. We have added a how to for a few popular devices below. Please note that your private VPN server supports both PPTP and L2TP with IPSEC. This means that your VPN server supports most devices out there including older routers. You can connect to your VPN server with either PPTP or L2TP as supported by your device.
The parameters for your VPN connection are
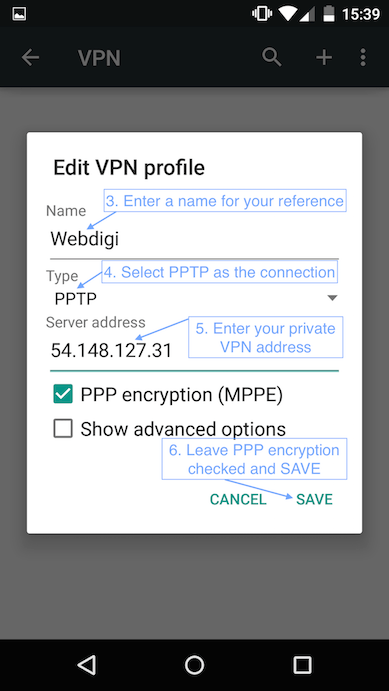
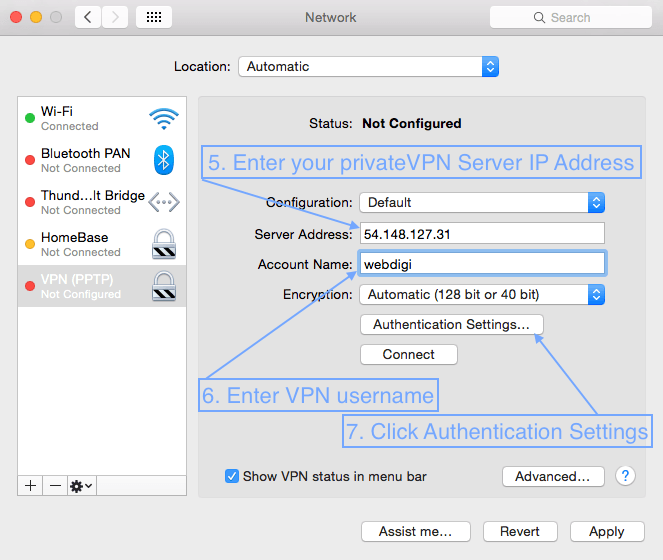
Server Address: The IP address from step 9 and this is unique for your VPN server.
VPN Username & Password: From step 6 above. Same username & password for PPTP / L2TP VPN.
VPN Passphrase: You set this up on step 6 above and only have to be used with an L2TP connection.
Examples below use PPTP but you can also find out how to setup L2TP with IPSEC on various websites.
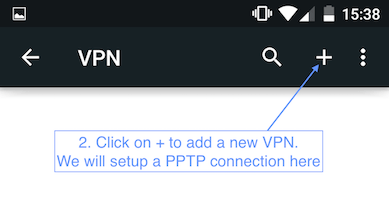
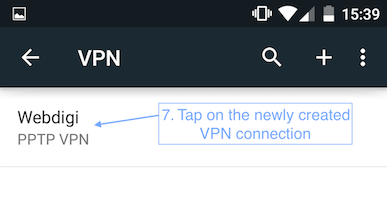
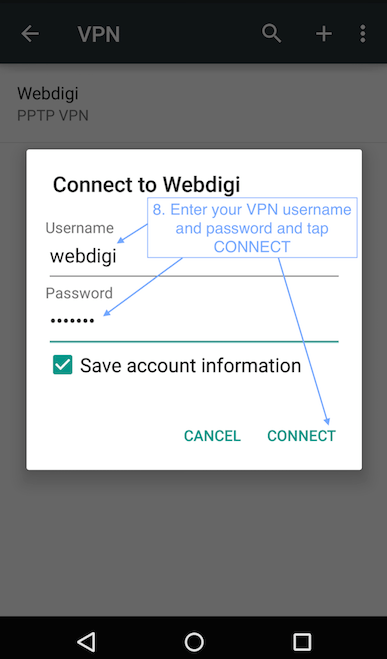
1. Setting up VPN on an Android 5.0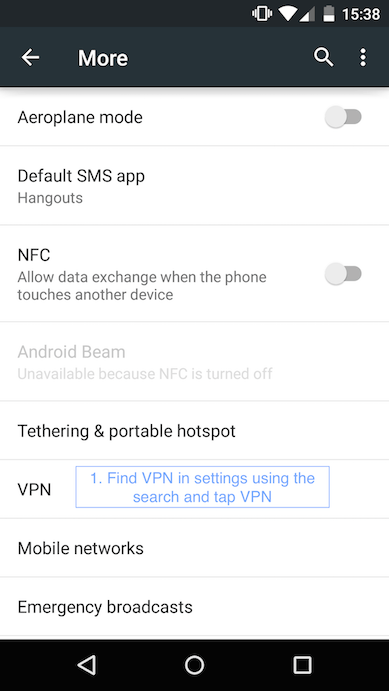
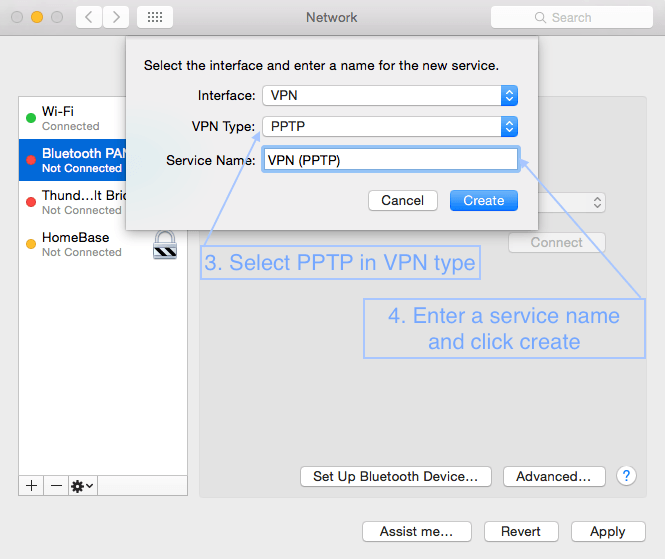
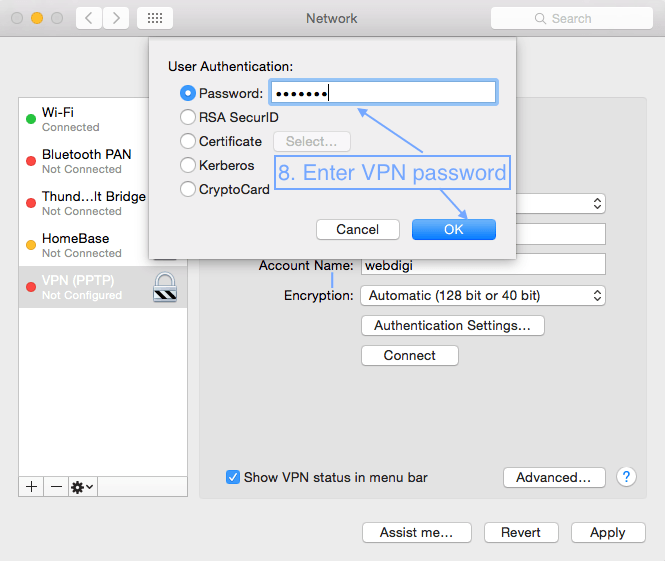
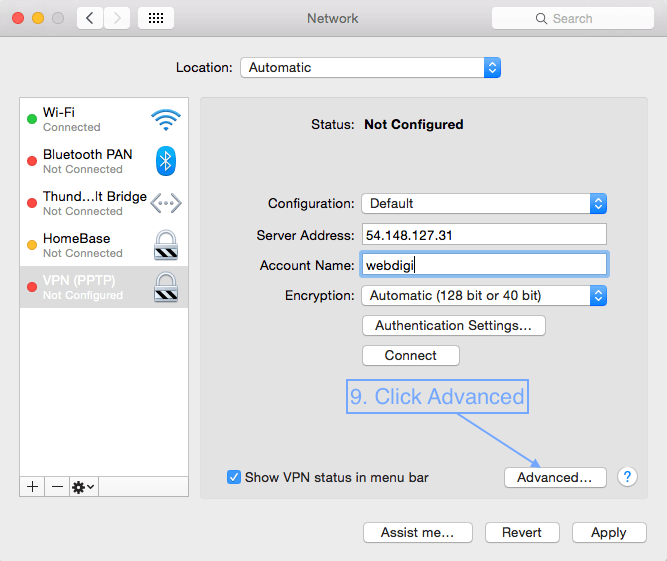
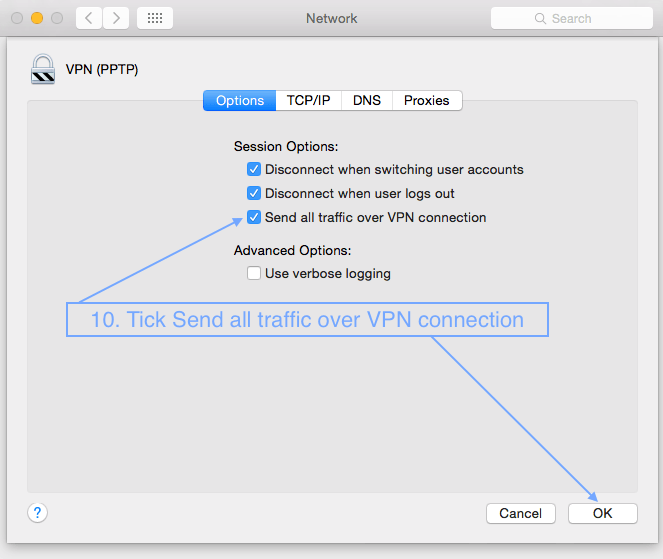
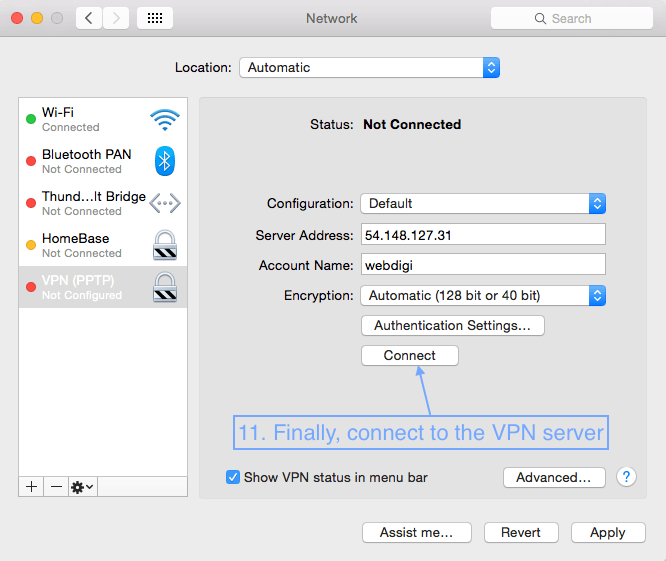
2. Setting up VPN on a MAC with the PPTP connection.
*UPDATE Nov 2016: PPTP is not supported on macOS Sierra so follow point 3 using L2TP over IPSEC (below).
*
First open System Preferences, then Network and follow the screenshots below.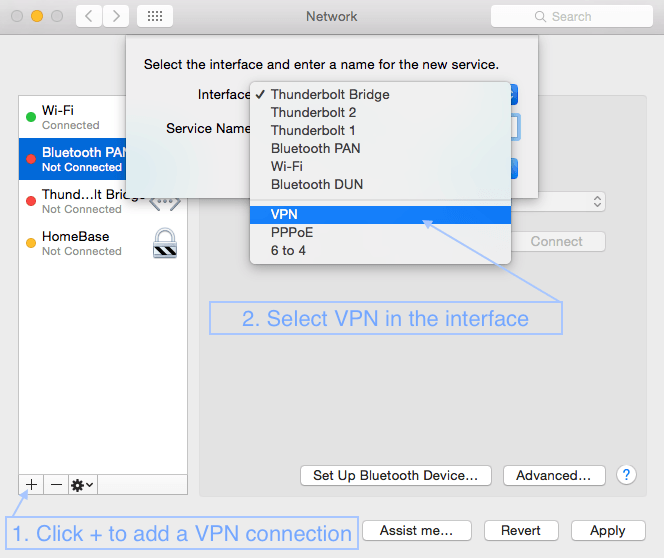
3. Setting up VPN on a Mac with L2TP over IPSec
UPDATE Nov 2016: L2TP is recommended now. Follow instructions as in PPTP after you setup up to point 8 below.
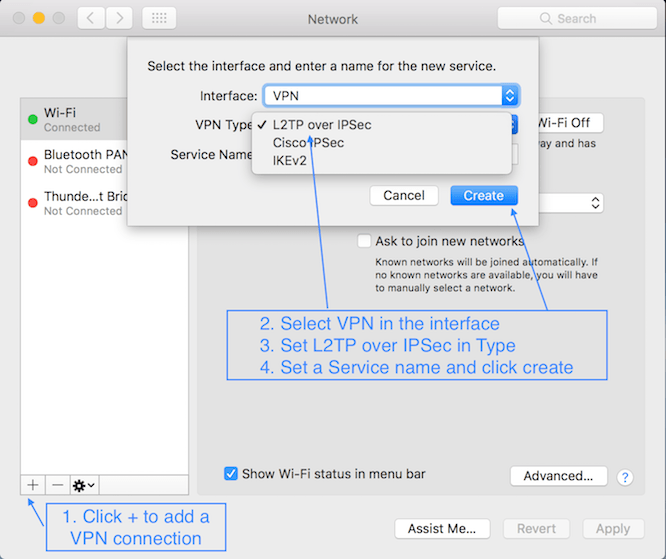
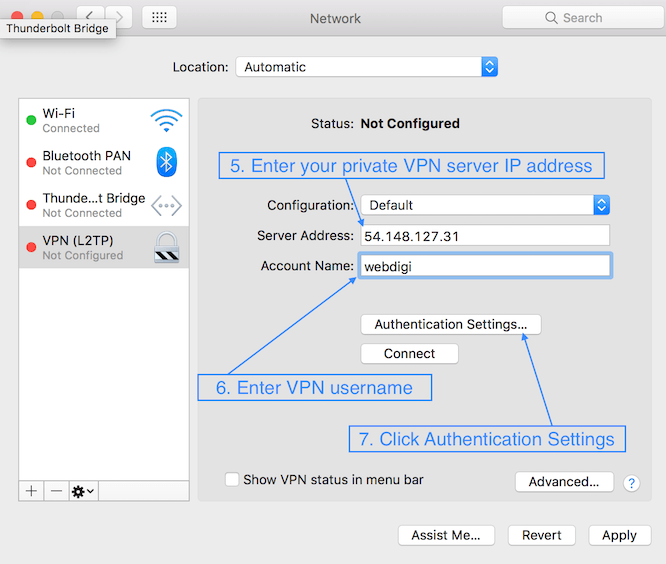
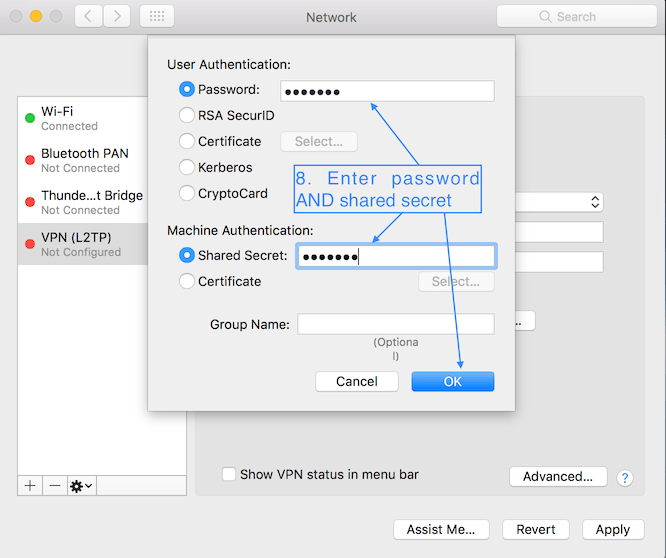
Follow other steps as outlined in the above section on PPTP to finish the setup.
4. Setting up VPN on Asus RT-AC68U router
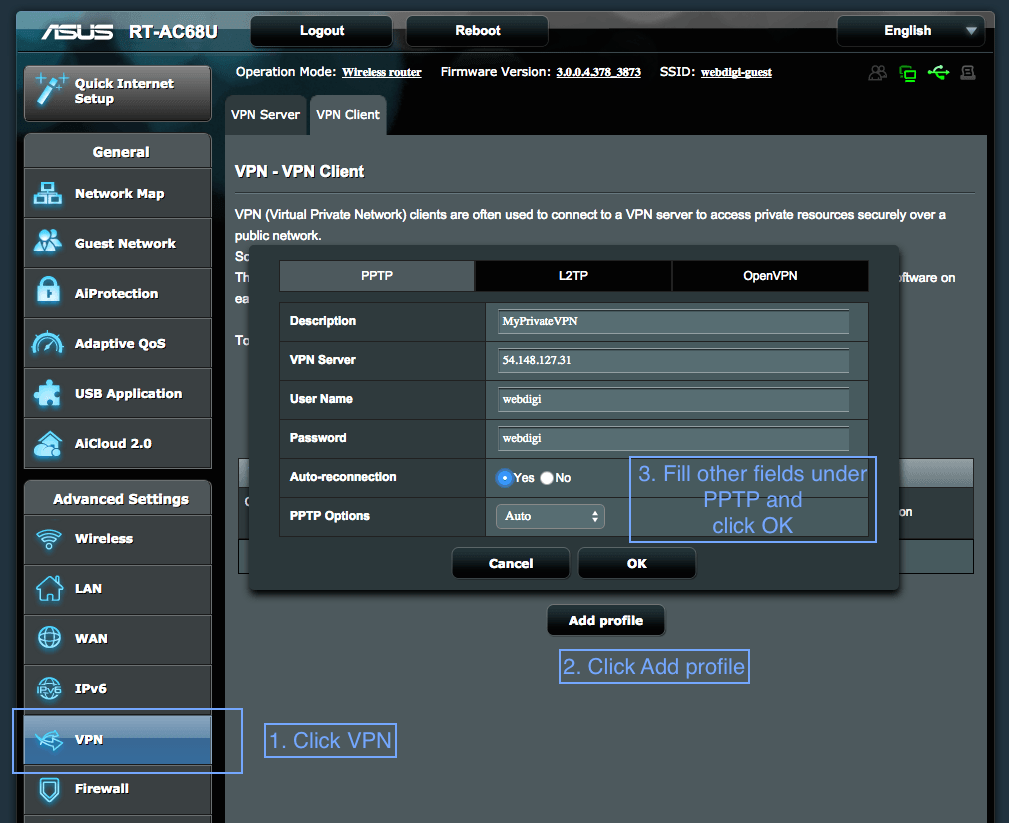
5. For all other devices please search for Setting up PPTP VPN on my iphone and so on. You can also setup an L2TP IPSEC VPN which is more secure but might not be supported on all devices.
Tips / Suggestions
==================
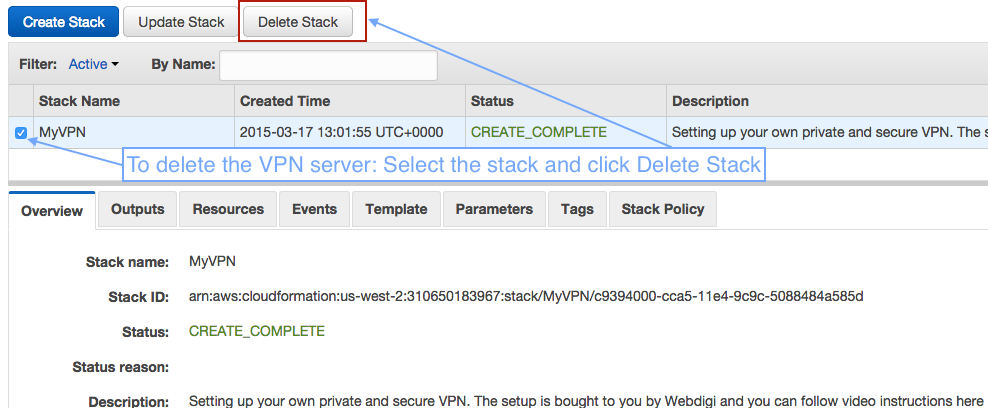
1. If you want to delete your VPN server then just open CloudFormation on AWS. Make sure you select the same region that you created your VPN server. Then just click on Delete Stack button and your private VPN server will be removed.
2. You can have multiple VPN servers all over the world. You just have to repeat the setup steps in this guide by selecting different regions. Please note that AWS free tier gives you a total of 750 hours a month free. You can also delete and create VPN servers as frequently as you want.
3. Setting up a VPN connection on your router will allow all devices on its network to use the VPN server. This could be beneficial for use with AppleTV / Chromecast and any device that does not support a VPN.
4. You can test if your VPN connection is active by just searching for “what is my ip address” on your favourite search engine. The IP address reported will be that of your private VPN server if everything is your connection is enabled. If your VPN connection is not enabled or if the VPN server settings are not complete then it will report your ISP’s IP address.
5. We love your feedback and let us know if you face any issues in the comments section below or on our github page for setting up your private VPN on AWS .


